First, you need to contact us by opening a support ticket to enable SSH access for your hosting account.
After SSH is enabled, connect to your hosting account using any SSH client.
Use the same hosting username and password.
Create a Node.js Project Directory
Open SSH or the File Manager from cPanel and run the following commands:
mkdir ~/nodejsapp
cd ~/nodejsapp
Upload your project files into this directory, or create a test file named:
app.js
Add the following basic code inside it:
const http = require('http');
const hostname = '127.0.0.1';
const port = 3000;

const server = http.createServer((req, res) => {
  res.statusCode = 200;
  res.setHeader('Content-Type', 'text/plain');
  res.end('Hello World! NodeJS\n');
});

server.listen(port, hostname, () => {
  console.log(`Server running at http://${hostname}:${port}/`);
});
Test the Application Manually
/opt/cpanel/ea-nodejs22/bin/node app.js
The Node.js version may vary depending on the server (currently version 22). If it fails, please contact us to confirm the available version on your hosting.
If successful, you should see the following message:
Server running at http://127.0.0.1:3000
Test it using curl:
curl http://127.0.0.1:3000
The response should be:
Hello World! NodeJS
Register the Application in cPanel (Application Manager)
From your cPanel dashboard, go to:
Application Manager
Create a new application and fill in the fields according to your project name and directory.
Example:
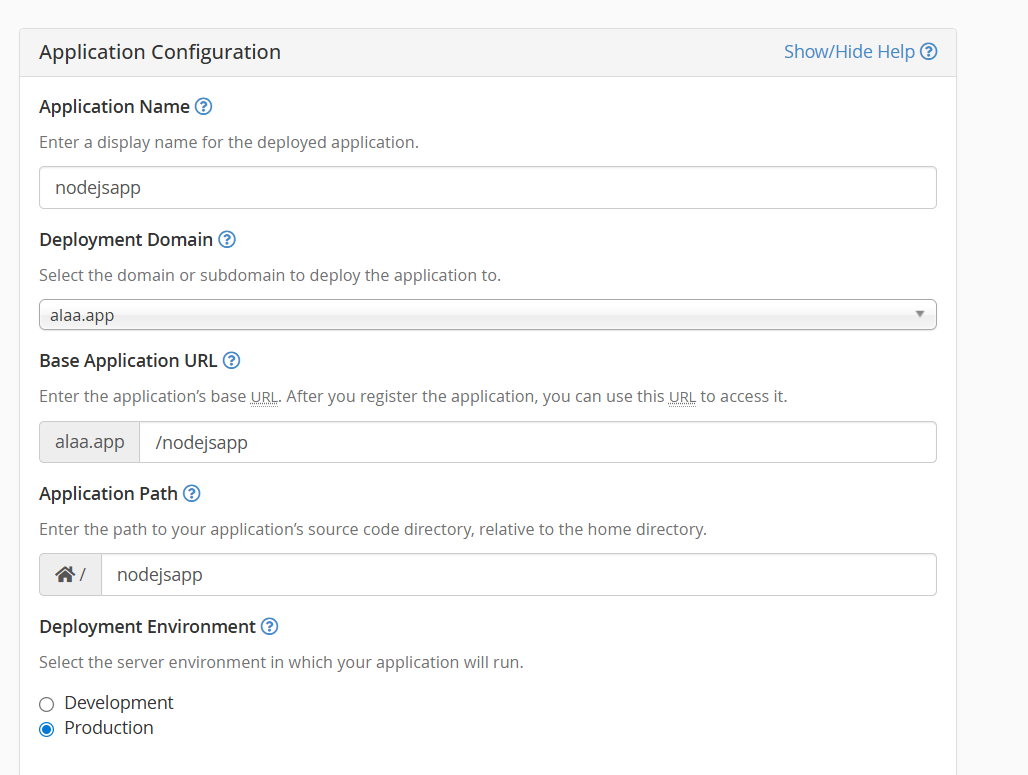
After about a minute, the application should be running and accessible via a URL such as:
Start / Restart the Application
Whenever you make changes to the code, the application must be restarted.
Create the following directory and file inside your project folder:
mkdir tmp
touch tmp/restart.txt
After every code change, run:
touch tmp/restart.txt
simplified from the official cPanel documentation:
https://docs.cpanel.net/knowledge-base/web-services/how-to-install-a-node.js-application/
